RC41. My Memory Having RC Car. My No 21 RC. 1/10 - 2001 Thunder Tiger DT10 2WD Nitro Stadium Truck.
Thunder Tiger DT10 2WD Stadium Truck Nitro, introduce in year 2001. A rear wheel drive. I buy Same prices Rm66.66. My third rc of 3 buy for RM200. I have few spare parts for front suspension.

Start bloog = 11/2/2018
Last update bloog = 5/2/2026
Sum for spareparts = Rm25.00
2001 - 2026 = (25 Years)@
Made in TAIWAN (🇹🇼)

Problem found in this truck
1. No Fuel tank
2. No Body.
3. No servo
4. With 3 damper low oil, 1 leak.
1. No Fuel tank
2. No Body.
3. No servo
4. With 3 damper low oil, 1 leak.
5. Missing 1 pcs rear lhs wheels.
6. No ball bearing on all wheels.
7. No engine
8. No greese on rear gear
6. No ball bearing on all wheels.
7. No engine
8. No greese on rear gear
9. No exhaust pipe.
10. Rear body post dent.
11. Steering arm with cable tie the bracket not strong.
Check from internet many say it fun rear wheel drive. Is a truck but same as truggy wide tyre or buggy. I thing 2 combine into one. For this truck i have no problem with it, not that dirty and very simple truck not like other 4wd buggy or truggy. Problem i can't get the assembly manual only instruction manual how to play this truck. No Fuel tank can buy from other Type Rc. The rear tyre i can buy, but for front different 2 ball bearing on the rim no wheel hex. I already try up using HoBao C hub and steering knuckle need modification to use axle with fix hex screw on it. I will do it next time but now just use back ori.

Finaly i found the assembly manual on 19/2/2019. Download the PDF file and photostate. Just tipe (DT10 Manual RCPro.no )in web there a side download on PDF.
A) The photo taken before i remove and clean all the parts.
B) Removing the parts look for damage, same time study the parts, the good thing is very simple 2wd.
C) This my task to assemble back without the instruction manual. Slow and few time i fix then remove, some parts must go in first. manage to complete it .
That all for this truck use 2 days to finish it. Time to time if found some parts that i mention i will add photo. No more task after this. Need to buy and look around to get cheap secondhand RC.
Too boring no second hand rc to buy for cheap prices yet. Most saler in malaysia sale second hand more then Rm250 above some can reach Rm1200 buggy. So on 2/3/2019. I take out this buggy and start to modified electric motor in. To buy nitro engine expensive Rm500 above. I change the main gear using HSP truck and pinion using Yokomo gear. Put in a johson motor modified two brackat holding the motor. Take ouy the ESC from my buggy . Thing remove from DT10 1 Servo, on off switch, brake pad and parts, Maint gear, fuel tank and linkage. After assembly the electric motor, wooo it function the buggy can move without problem. Only too slow due to the normal motor i using. Next have money i will buy better motor.
Special DIY engine mounting for it. Made on 30/5/2020

On 24/10/2020 Nilai 3 rc hunting get 3 pcs loose empty damage engine. For Rm0.50 after divided into few engine parts. I clean it and fix what parts i have. But this engine not function only for show for this truck.


Check from internet many say it fun rear wheel drive. Is a truck but same as truggy wide tyre or buggy. I thing 2 combine into one. For this truck i have no problem with it, not that dirty and very simple truck not like other 4wd buggy or truggy. Problem i can't get the assembly manual only instruction manual how to play this truck. No Fuel tank can buy from other Type Rc. The rear tyre i can buy, but for front different 2 ball bearing on the rim no wheel hex. I already try up using HoBao C hub and steering knuckle need modification to use axle with fix hex screw on it. I will do it next time but now just use back ori.

 |
| The box |
 |
| New image |
 |
| The truck body |
Finaly i found the assembly manual on 19/2/2019. Download the PDF file and photostate. Just tipe (DT10 Manual RCPro.no )in web there a side download on PDF.
 |
| The front page |
 |
| One of the assembly page |
A) The photo taken before i remove and clean all the parts.
 |
| This is my Truck |
 |
| Front section, every parts still good |
 |
| Come with a sanwa 40hz AM reciver, a battery case and switch |
 |
| Rear suspension, missing 1 tyre |
 |
| Rear Big tyre |
 |
| The rim, vintage difficult to get new. even the tyre size |
 |
| Front rim and tyre. The rim Is different |
 |
| Rear under |
 |
| Front under |
 |
| Front steering knuckle. I have extra parts for it. |
 |
| Small bumper, one damper leak, one body post for front. |
 |
| Steering linkage |
 |
| The antena bracket still attach and the battery case |
 |
| 1 speed gear, the linkage for brake and engine acc |
 |
| Rear rhs arm using dogbone |
 |
| Very long connecting rod |
 |
| Rear alum shock tower, from in side view |
 |
| From out side view |
 |
| Bottom view lest scratch |
 |
| Radio tray, switch |
B) Removing the parts look for damage, same time study the parts, the good thing is very simple 2wd.
 |
| The front rim using 2 copper bushing, not using hex nut. This is out side view |
 |
| Front rim inside view, special . |
 |
| This is rear rim with No hex seat |
 |
| The front wheel carrier just a long shaft and 2 bearing will attach on it. |
 |
| Back wheel with hex nut but the back rim different. Need to find other rim and tyre. |
 |
| With long turn buckle and shaft |
 |
| Brake / acc linkage |
 |
| The main plastic gear and brake bracket |
 |
| Brake caliper and bracket, full of dust |
 |
| Plastic Single speed and brake disc |
 |
| The brake caliper and brake lever |
 |
| Plastic disc |
 |
| All remove very dirty |
 |
| The rear gear, gress almost dry |
 |
| the main gear lhs, if damage no spare parts |
 |
| Pinion gear and drive gear |
 |
| Diffrential gear still greesey and one screw broken really tight. |
 |
| Rear arm dirty |
 |
| Rear knuckle mealting due to over heat from wheel, no ball bearing, only copper bushing created more heat. |
 |
| Coper bushing in and out, i change both to ball bearing. |
 |
| In 4 damper 1 leak that is with dirty one |
 |
| Radio tray |
 |
| Front section |
 |
| No damage after i remove the tie. May be not strong the tension |
 |
| Front damper remove |
 |
| All the dismental parts |
 |
| The parts not many |
 |
| All part sock it in Soap to soften the dust before wash |
C) This my task to assemble back without the instruction manual. Slow and few time i fix then remove, some parts must go in first. manage to complete it .
 |
| The clean look, no fuel tank |
 |
| The gear still ok no damage |
 |
| Back suspension arm |
 |
| From inside |
 |
| The final drive case |
 |
| Radio tray with 40hz receiver still can use, 2 servo just for display damage. |
 |
| Side view |
 |
| Front suspension |
 |
| The steering arm i remove the cable tie, no damage may be not strong . |
 |
| Rear bottom. |
 |
| Front bottom |
 |
| The bottom chassis not much scratch |
 |
| The front shock at top i add a small alum plate to hold. Because the screw too long very week when heavy bump, a bar more strong it from TT TS4N. |
 |
| Closer view |
 |
| Add a kyosho engine for show. If have extra money will buy a novarossi 12 engine. |
 |
| A damage fuel tank to show. Need to buy new in KL |
 |
| Just to show the car with parts |
 |
| Just put my broto body. To show the vehicle |
 |
| The rear wheel from my biggy, not match small, need to find other wheels . |
 |
| From front view |
 |
| From top |
 |
| Rear wheel smaller then front |
 |
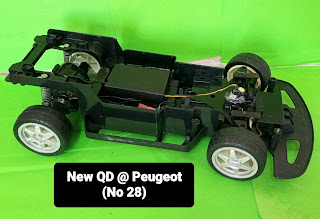
| That the view if all parts in. Very nice truck, |
 |
| From side |
 |
| From top |
 |
| Front side |
 |
| Back side view |
 |
| With engine and exhaust. |
 |
| Nice truck. But to really run this rc i need to buy 2 servo, receiver, complete engine, body, fuel tank, that only parts to run this truck |
 |
| Finaly i use my bronto wheel can match but little big. who care it just for fun and learn to modified an old rc without ori parts. The the rear fun in RC. |
 |
| Last put in a Savage truck body. |
 |
| Front view |
 |
| Back view. Body damage but it look stuning for old truck |
 |
| with rear big wheels |
 |
| The end body view |
That all for this truck use 2 days to finish it. Time to time if found some parts that i mention i will add photo. No more task after this. Need to buy and look around to get cheap secondhand RC.
 |
| On 11/2/2018 buy a fuel tank for Rm25 Beast speedy Racing brand china. Need to modified the bottom bracket before nice fit. |
 |
| Modified a handle bar on the radio tray |
Too boring no second hand rc to buy for cheap prices yet. Most saler in malaysia sale second hand more then Rm250 above some can reach Rm1200 buggy. So on 2/3/2019. I take out this buggy and start to modified electric motor in. To buy nitro engine expensive Rm500 above. I change the main gear using HSP truck and pinion using Yokomo gear. Put in a johson motor modified two brackat holding the motor. Take ouy the ESC from my buggy . Thing remove from DT10 1 Servo, on off switch, brake pad and parts, Maint gear, fuel tank and linkage. After assembly the electric motor, wooo it function the buggy can move without problem. Only too slow due to the normal motor i using. Next have money i will buy better motor.
 |
| Modified using ESC |
 |
| Change the main gear using HSP truck gear. |
 |
| Using a yokomo pinion gear. To noisy when move the gear mash not same need to change other pinion gear. |
 |
| Using 2 bracket holding the motor. Lhs tighten on the engine stand hold. The rhs hook on the flywheel hole and top tighten on the brake bracket. Next i will buy the motor mount. |
 |
| Using a johnson motor not power slow. |
 |
| The flysky receiver 2.4. Remove the old AM receiver. |
 |
| Using ESC from my buggy. |
 |
| The batery at center after i remove the servo for brake and acceration |
Special DIY engine mounting for it. Made on 30/5/2020

 |
| Only left this few spare parts. |
On 24/10/2020 Nilai 3 rc hunting get 3 pcs loose empty damage engine. For Rm0.50 after divided into few engine parts. I clean it and fix what parts i have. But this engine not function only for show for this truck.

 |
| Single speed |

Enjoy RC
Sorry can't get the pdf download on my blog. I will find the web page later. Time been this the assembly manual. Found the web page DT-10 - Owner Manual - Korg is a pdf file downloaf. Happy hunting


Enjoy RC


Comments