On 13/04/2014, late going fleamarket in Seremban, around 12pm reach there, Walk as usual then sported this Malay guy call Mr AJAK, always have RC car to sell. There are two on the ground, one unknown name another Nikko, all two is buggy 1/10, condition no name buggy is bad all tyre harden and broken, some spare parts missing but nikko condition front tyre rubber missing. I grab the buggy without name and ask for the prices RM50, and then i bargen RM30 he say take it, he don't want to keep more longer same time call me to buy the Nikko Buggy too, Nikko buggy is normal grade toy.
Go back slowly dismantle and take photo after open the bottom cover the name appear TAMIYA RCC HotShot Buggy - Made In Japan. OK happy get another 1/10 buggy this time, many missing parts and damage parts for this buggy. The suspension damper is 2012 parts Super Hot Shot 1985 suspension damper have two pcs. The rim from Hotshot is yellow got white, the chassis have no top cover, I think the previous owner mix it or up grade 1985 to 1986. Do more research there are 3 version 1 = 1985 Hot Shot, 2 = 1986 Super Shot, 3 = 2012 Super Hot Shot.
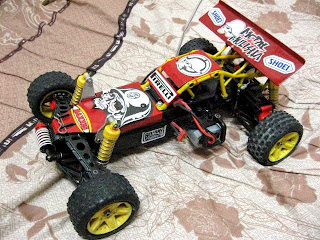
My is 1986 1/10 RC 4WD SUPERSHOT BUGGY. This is the first 4WD electric buggy in 80s by Tamiya. It sale worldwide and very famoust because in the market no RC buggy came out with 4WD system, in 70s most buggy with RWD. In 2007 this buggy on sale again after 15 years end production and it equipped with ESC. 2012 again new RE Release version call Super Hotshot.
Start blogger = 15/4/2014.
Update blog = 4/2/2026.
Sum for spareparts = Rm482.48
1986 - 2026 = (40 Years) @
Made in Japan (🇯🇵)
The list of missing parts or damage.
1. All 4 pcs wheel drive shaft missing
2. All 4 tyre damage.
3. Battery bottom guard holder missing.
4. Center lower guard missing
5. Chassis plastick eazy break
6. Dummy head missing.
7. Front bumper missing
8. Front lower guard missing
9. Front bumper stay missing
10. Front shock stay bend.
11. Front and rear axle gear dry greese
12. No body cover .
13. No rear wing.
14. Not fully using ballbearing.
15. No remort control
16. No receiver
17. No steering servo.
18. No motor
19. No steering rod
20. Low oil in all damper
21. Missing bever gear no 4x4
22. Missing center shaft for 4x4
23. One damper spring adjustment missing.
23. Rear damper bottom guide loose.
24. Steering knucke loose lhs/rhs
It the end i manage to clean up and add some parts, motor, servo for front steering, the rear battery guard, antenna, so i can see the rear buggy shape. Then need to go down town to buy more parts but not in the hurry. I will slowly repair it.
Given this Sanwa Blazer Remote
 |
| The 1/10 TAMIYA 1986 SUPER SHOT 4WD Buggy. The condition before dismantle. |
 |
| Front view no bumper to protect front end and servo arm. |
 |
| Rear View |
 |
| Under View the battery bracket missing and under cover. |
 |
| Front suspension without drive shaft. |
 |
| The damper and damper stay (bend) |
 |
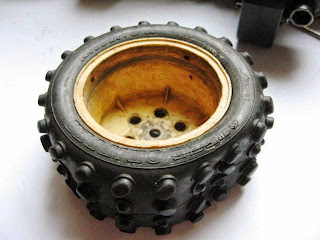
| The front rim and tyre. The rubber is harden and crack |
 |
| Rear rim and tyre with triangle wheel adapter |
 |
| Rear stabilizer rod |
 |
| 4wd Rear gear box propeller joint without propeller. |
 |
| The old ceramic resistor |
 |
| Rear Damper |
 |
| The Cock pit without dummy head |
 |
| Ghost driver |
 |
| The on /off switch location |
 |
| The aluminium roof |
 |
| The front top suspension arm |
 |
| The front bottom suspension arm |
 |
| The front gear box bottom view |
 |
| The front gear box joint without drive shaft. |
 |
| The motor location |
 |
| The rear wing attachment bracket |
 |
| Rear suspension top arm |
 |
| The rear suspension lower arm |
 |
| The battery location |
 |
| lhs is the propeller location from back to front |
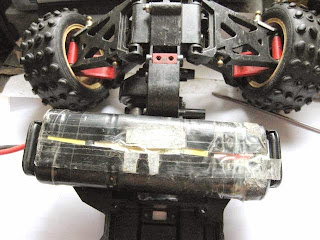 |
| The battery location bottom. |
 |
| The bottom compartment housing for servo, ESC, recever. |
 |
| Inside |
 |
| Front gear box with propeller joint |
 |
| The rear propeller joint |
 |
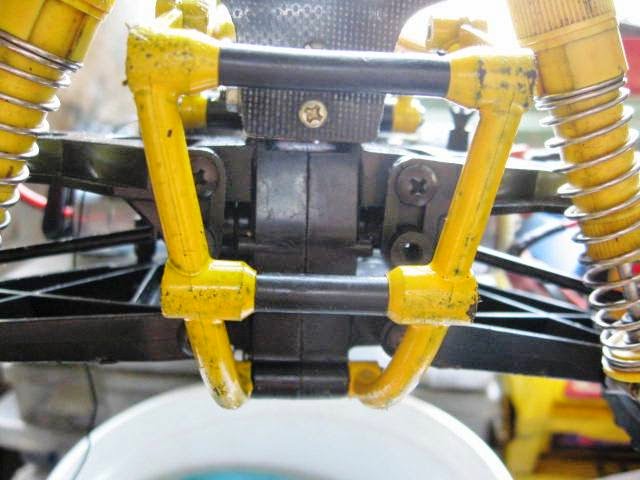
| Rear stabilizer bracket |
 |
Rear stabilizer set
|
 |
| The rear damper bottom stay loose |
 |
| The rear damper |
 |
| Damper parts |
 |
| The roll cage |
 |
| TAMIYA RCC Hotshot |
 |
| Made In Japan |
 |
| The rear suspension |
 |
| No drive shaft for rear suspension |
 |
| The Wheel hex using triangle plate can be change to normal aluminium hex, the rim need to change also. |
 |
| Rear tyre (Racing Size 12.50-20 Super Gripped), Front Tyre (Racing Size 9.50 - 20 Super Gripped) |
 |
| turn bulgy due to too long on ground |
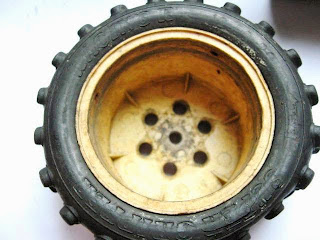 |
| Inside the rim |
 |
| When remove the tyre from rim all rubber break |
 |
| Pcs to pcs will find if sale |
 |
| The Rim white not yellow |
 |
| The wheel adapter with ball bearing outside loose. |
 |
| Inside using bushing need to change all to Ball Bearing. |
 |
| The Upper arm for rear suspension |
 |
| The 2012 ball end for rear damper. |
 |
| Bottom arm rear suspension |
 |
| Both usage bushing and ball bearing. |
 |
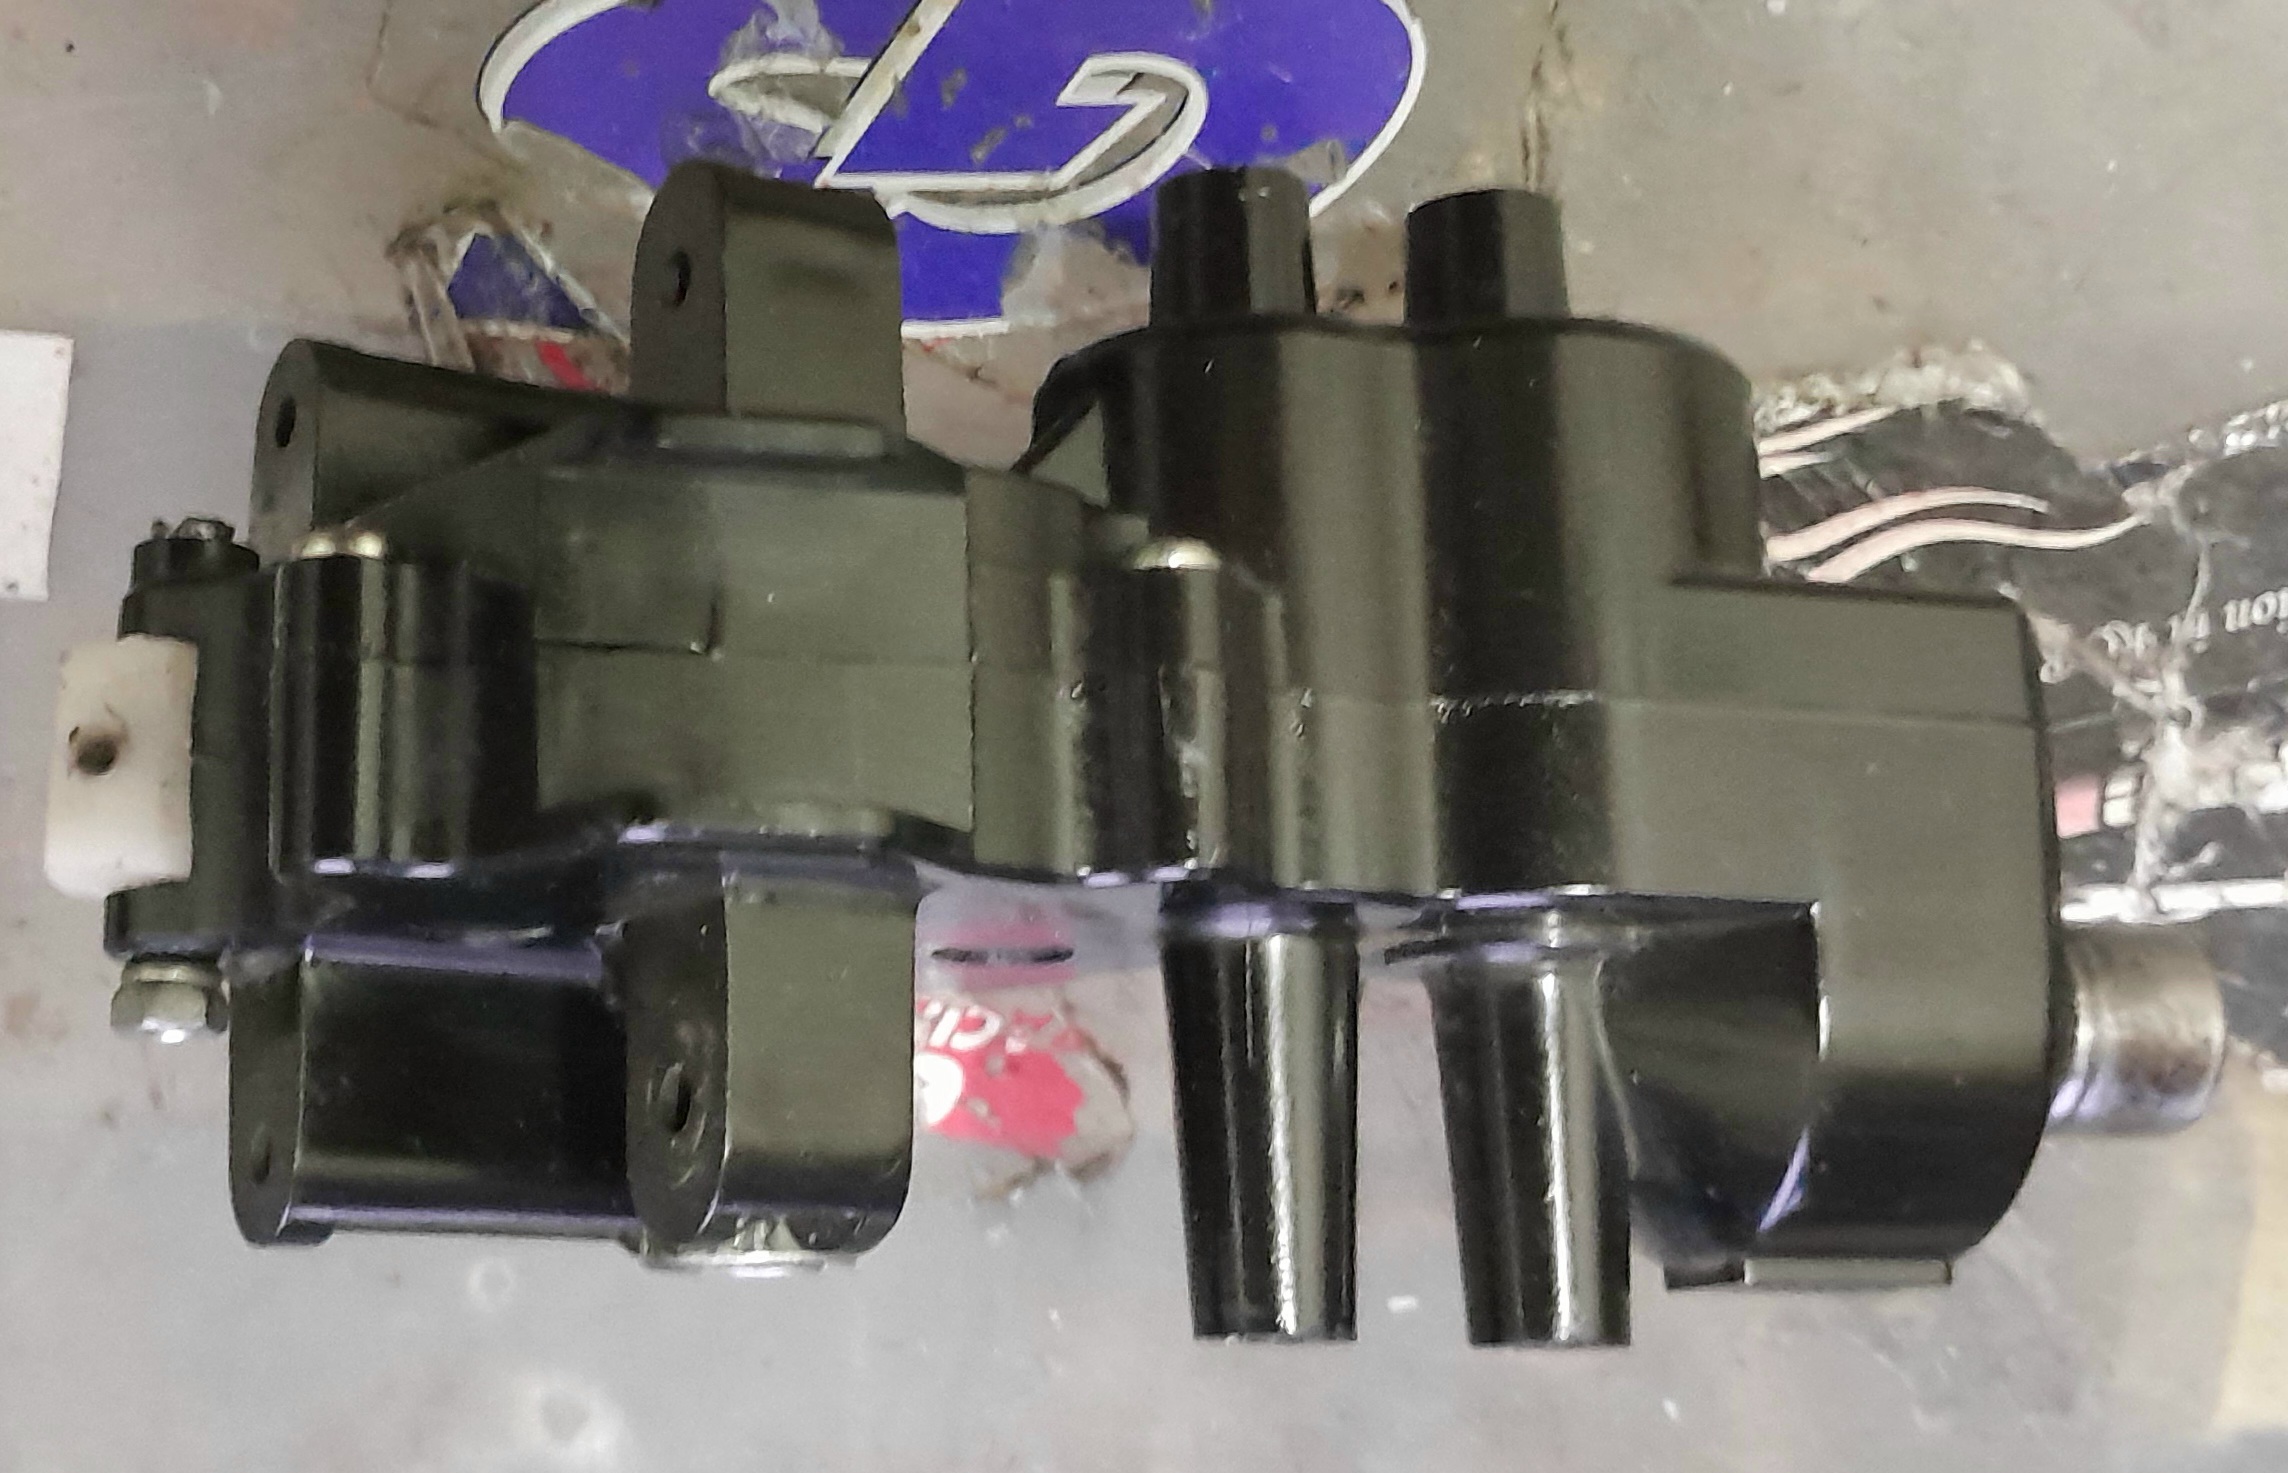
| Rear Gear box housing |
 |
| The alum bracket for rear bumper stay |
 |
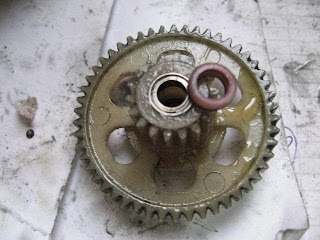
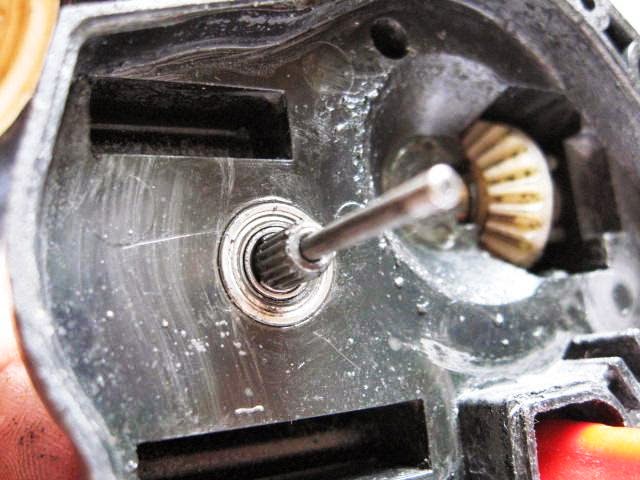
| Inside the rear gearbox |
 |
| Drive Gear |
 |
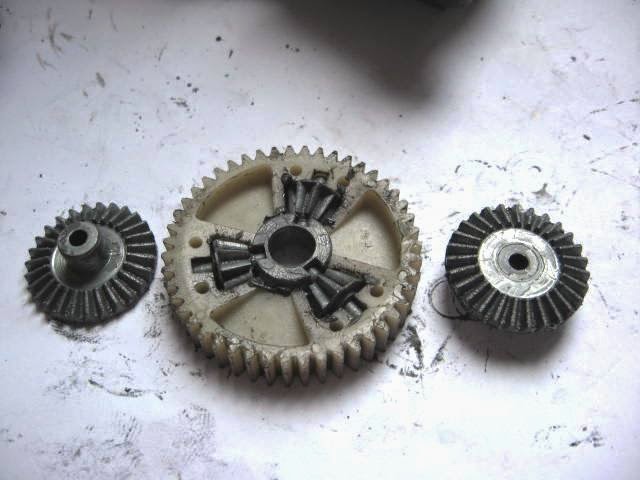
The spur gear and bevel gear missing one
|
 |
| Set of gear |
 |
| The propeller drive gear |
 |
| The parts |
 |
| The rear drive shaft wheel axle |
 |
| The bottom bracket for Battery plate |
 |
| The bracket for rear stabilizer |
 |
| Front wheel carrier Loose |
 |
| Top View |
 |
| The Front suspension arm |
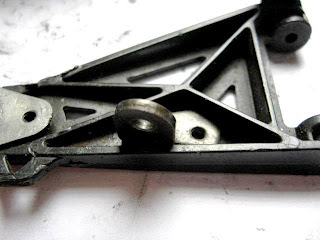 |
| The lower arm with damper stay |
|
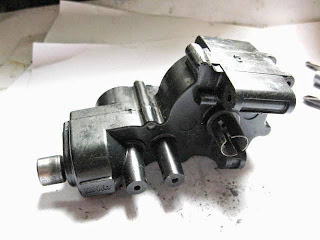 |
| Front Gear box |
 |
| Inside the gear system |
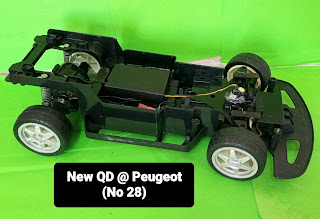
This photo is after cleaning and redo. The tyre on loan from my Kyosho some parts to add in as to show the Buggy rear image
 |
| Just add a motor to show the location |
 |
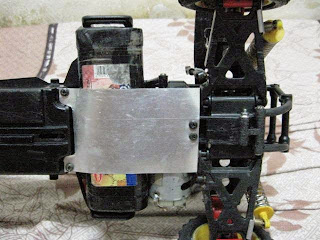
| Bottom view add a alum plate to hold the battery but too soft thing other idea |
 |
| Servo arm for front steering location |
Time to time i will add image until this buggy can run
Modification / repair 15/04/2014
 |
| Two pcs DIY hard alum plate to hold the battery |
 |
| Manage to get a HSP buggy drive shaft just only 2 pcs RM20 |
 |
| DIY Bracket to attach rear wing |
 |
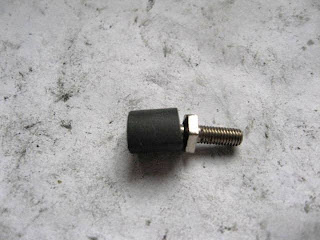
| The original wheel adapter using Triangle mounting, i Change 6mm alum adapter |
Modification / Repair on 18/4/2014
 |
| The rear gear box now with full ball bearing |
 |
| From bushing to ball bearing |
 |
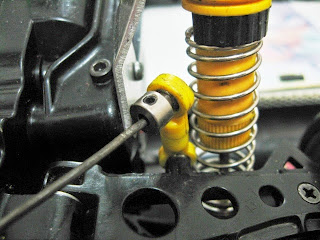
| The front knuckle arm lhs and rhs loose due to worn off bushing the red colour to overcome this problem i use a shrinkable tube on the Ball connector. |
 |
| Cut the tube according the length of the ball |
 |
| Put it in and head the tube until shrunk. |
 |
| The end result |
 |
| Before fixing back, add some grease or oil on the outside tube surface and inside, fix every thing back and turn the arm to let it smooth. if no grease it really tight. |
 |
| Open one dummy head from TB01 |
 |
| The On /Off Switch |
 |
| My Crazy idea add one more damper in front |
 |
| Use a hard spring, Not yet drive this buggy soon |
Modification / Repair on 19/4/2014
 |
| The roll bar i spray to yellow colour |
 |
| No body cover, I DIY a cover from alum and paint red colour. |
 |
| Add a servo |
 |
| My old ESC just to test this buggy from my Kyosho buggy |
 |
| The small receiver |
 |
| All in the compartment |
Modification / Repair on 20/4/2014
 |
| The original Rim i spray silver chrome, only tyre need to buy. |
The final condition, This buggy only using RWD due to front one bevel missing, Condition 70% done, parts to buy 12pcs ball bearing, body cover if have sale, bevel gear, propeller shaft, buggy tyre,
 |
| Add some sticker to make it look good |
 |
| Bottom front a DIY a alum to cover the servo arm |
 |
| Using a 450 Motor just to try the condition of the gear. so far it in good running condition. If have extra money i will buy one new motor. |
 |
| Temporary using my Kyosho tyre |
Modification / Repair on 21/4/2014
 |
| Use my extra bumper from kyosho to protect the front suspension arm |
 |
| Below cut a pcs of alum plate to hold the bumper. |
 |
| Due to the alum cover too thin and damage easy, i DIY two pcs alum hard bracket. |
Modification / Repair on 24/4/2014
 |
| Add Front Stabilizer bar |
Modification / Repair on 13/5/2014
Due to no propeller shaft, i DIY with a aluminium Chopstick. End Resault can be use.
 |
| A pair just for RM1.80 |
 |
| Cut the length same as original Propeller shaft |
 |
| Drill a hole at both end |
 |
| Find the same size pin/shaft for the hole. |
 |
| The pin should be in center, each end should be same length |
 |
| If can aluminium welding better |
 |
| Use glue to hold the shaft |
 |
| Or use super glue |
 |
| Only use this mated on close propeller joint |
 |
| Insert in to the propeller joint |
Modification / Repair on 11/6/2014
 |
| Buy new ESC Brush can use Lipo or Nimh Battery RM55 |
 |
| Using Ribbed trade for front. This buggy using rear wheel drive front bevel gear missing so no 4x4 |
 |
| Rear Bowtie Trade |
Modification / Repair on 30/07/2014
 |
| Change all the wheel hub to ball bearing (8 PCS RM48) |
 |
| Using rubber seal ball bearing |
Modification / Repair on 16/08/2014
My first DIY body cover not nice most parts is peace by peace using glue to joint it. so what i did i use a big peace of aluminium plate and custom made a complete body without joining the body parts.
 |
| The first body cover |
 |
| Bottom View |
 |
| Second DIY Body, no joining parts |
 |
| Bottom View |
 |
| Same colour red |
 |
| Bottom View |
 |
| On the RC car |
 |
| Add some stiker |
 |
| Add 2 dummy sport light |
31/8/2023 found saler from sabah sale bevel gear 19440510 for Tamiya the frog Rm60 order wait. Ori number 9440510. From ebay this frog can use in hotshot.

4 more item use condition i buy from Perak Taiping for Rm44.50
 |
| Bottom protection cover 1933569539 |
 |
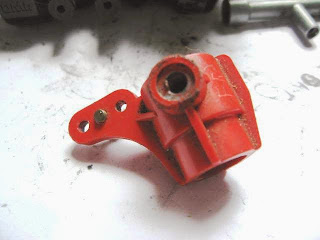
| Front gearbòx housing 179115191 |
 |
| Front/Rear drive gear 19005167. Bottom rhs for Frog. |
 |
Ball plate new 19805123.
|
6/9/2023 got all the parts, build back 4x4 system. Remove front housing the old cover crack. Bevel gear same size
 |
| Bottom old parts same size |
 |
| Bottom chassis cover. |
 |
| The old housing crack after remove |

|
| Lhs old but in good condition |
 |
| Done assembly front axle fully greese and 4x4 |
 |
| Front dogbone fixed |
 |
| Using the DIY proppeler shaft. Need to find the ori |
 |
| Bottom cover fix. |
This units almost with ori parts only need to find
1. Body cover
2. Ori tyre
3. Dummy head
4. Sport light
5. Front bumper and form 0005115/9005164
6. Battery plate
On 8/9/2023 order another 2 use parts from Taiping perak Rm 44. Proppeler shaft and tyre/front suspention arm.
 |
| Not sure condition 2 big 2 small and front suspension arm |
 |
| The ori proppeler 4135006. The saller did't mention from with RC. I make a comparison with ori image it a same. |
11/9/2023 got the parts, some parts plastic almost crack 30 years. 3 tyre same size 9.50/20. 1 pcs 12.50/20. 1 tyre crack 3 more still can use, i use the tyre compound to soften the rubber. The rim crack. The top front 1 pcs suspention arm broken (Frog). 2 pcs bottom ok. Proppeler same can use
 |
| This front tyre 1 pcs |
 |
| Rear tyre 3 pcs |
 |
| Rim crack, tyre rubber harden |
 |
| Only parts given |
 |
| Crack and damage parts |
 |
| Same size |
 |
| spray tyre soflen compound. Wrap in plastick |
 |
| Same size |
I manage repair two rear wheels. Front rim damage.
9/9/2023 Oder 2 front buggy tyre Rm19. Got it no glue. Inner daimeter big the old rim loose.
On 23/4/2024 found few mix parts from hot shot. The dummy head, side sport light, on/off cover and rear wheel hub
Enjoy RC


 Given this Sanwa Blazer Remote


Comments