My 2012 project, Recondition a broken RC Big Foot scale 1/12. It free found in a junk shop with
Problem found
1. Broken wheel hub front lhs.
2. Broken real lhs wheel linkage
3. Broken battery cover
4. Missing one tyre
5. No body
6. No body post
7. No remort control 27hz
8. Rusty all screw.
9. Rusty spring all.
10. Really hard plastick tyre
2 years back i buy this units from Internet for rm120, after testing i don't like it because all 4 tyre is a hard plastic i sole it. But know i got it free in bad Condition will rework back.
The New Modification i done for this big Foot is, i can use 2 type battery Nimh 7.2V 1800mAh or the original 9.6V 900 mAh Nicd. Using 7.2V battery i add additional wire out from the Circuit board and the battery i put on top of the Circuit casing.
The disadvantage is this battery is heavy, the big foot a litter bit slow but running time is longer. If use original 9.6V battery it run fast but running time short (Warning DO NOT PUT BOTH BATTERY TOGETHER,THE HIGH CURRENT 16.8V WILL BURN THE CIRCUIT BOARD)
On 31/8/2020 just searching for data in net found out this China made Maykasing is a copy cat of Tamiya QD Trail Master 1/14 46020 2002. The chassis almost same but quality wise Tamiya is better and china brand is 1/12 scale..
Start blogger = 5/7/2012. Update blog = 4/2/2026
2002 - 2026 = 24 Years
Made in China (🇨🇳)
 |
| This from Tamiya QD 1/12 46027 Trail Monster |
 |
| Online found overview from Tamiya |
 |
| The chassis almost same as my clone Truck. |
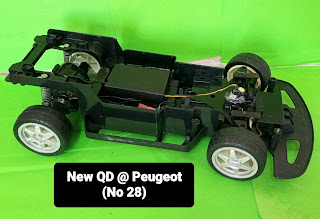
The Condition Before Total Clean and Modification.
.jpg) |
| The 1/12 Jumbo Wheel MAYKASING |
.jpg) |
| Under carrage the Battery Compartment |
.jpg) |
| The Rusty Shock Spring, Steering Rod and Screw |
.jpg) |
| The Broken Rear Linkage |
.jpg) |
| The Under Carrage |
.jpg) |
| Rear Wheel Drive Axle Case |
.jpg) |
| The Motor with Heat Sink |
.jpg) |
| The Hard Plastic Tyre |
.jpg) |
| The Broken Wheel Hub Lhs Front |
.jpg) |
| The Circuit Board 27mAh. |
.jpg) |
| Front Double Damper Rusty |
.jpg) |
| The Battery Compartment Cover Broken |
.jpg) |
| The Circuit Box |
.jpg) |
| Front Steering Box |
The Condition After Clean and Modification
.jpg) |
| The New Look After Recondition. |
.jpg) |
| Using a 7.2 V Battery and Same Circuit |
.jpg) |
| The Location for 7.2v Battery |
+Additional+wire+7.2V.jpg) |
| Additional Wire For Using 7.2V Battery. ( Additional - Neg wire solder at Negative wire on circuit board & Additional + Po Wire solder at switch before current passing to Switch) |
+Life+Wire.jpg) |
| + Wire solder at + wire before switch |
+Ground+Wire.jpg) |
| Negative Wire Solder on - wire on Circuit Board |
+9.6v.jpg) |
| The Original 8 Cell 9.6V battery |
+9.6+V+battery.jpg) |
| Inside The Battery Case |
.jpg) |
| The Modification on the Broken Wheel Hub |
.jpg) |
Using a 1/8 Scale HoBao
Buggy Wheel and Tyre |
.jpg) |
| Glue Back on the Broken Linkage |
.jpg) |
| The Clean Damper. |
.jpg) |
| Top View |
.jpg) |
| The Rear Body Post Modified |
.jpg) |
| The Rear Axle Case |
.jpg) |
| The Front Steering Box |
.jpg) |
| The Clean Steering Rod and Screw |
.jpg) |
| Front Body Post Modified |
.jpg) |
| Side View |
.jpg) |
| Front View |
.jpg) |
| Back View |
.jpg) |
| Top View |
.jpg) |
| Using a Truck Body |
.jpg) |
| Side View |
.jpg) |
| Front View |
Enjoy RC.
.jpg)


.jpg)


+Additional+wire+7.2V.jpg)
+Life+Wire.jpg)
+Ground+Wire.jpg)
+9.6v.jpg)
+9.6+V+battery.jpg)


Comments
You replaced the battery with 7.2v
Did it have the same voltage initially?
The battery bay looks suitable qonly for 4 batteries AA
You replaced the battery with 7.2v
Did it have the same voltage initially?
The battery bay looks suitable qonly for 4 batteries AA
Two Choise 9.6V (fast), shorten running time or 7.6V Litter (bit slow), longer running time.