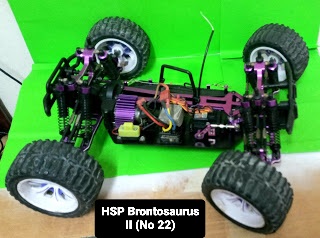
RC42. My Memory Having RC Car. My No 22 RC. HSP 94111 Brontosaurus 1/10 - 2001. 2nd units.
On 24/3/201. Facebook sale, a RC Brontosaurus 1/10 RM120 VERY Cheap. I think it from early 2017. But condition no electrical parts on it. Just the chassis and some aluminium option parts. After a call he willing to sale RM100 and COD in Shah Alam. Buy it because it have the aluminium parts on it. After got the truck I check the fault and found out why he sale cheap. This truck owner really don't know how to repair RC. All 4 shock absober not proper sit on the ball end, it push all in not center. This not a adjustable damper but given the spacer have two damper with full attach this spacer, after check the damper less tension because oil low. other fault few loose screw. Gear box with heavy super glue due to loose parts. Consider this owner just buy, play and no proper repair. All the shock absober fitted with wrong rubber cup and some with loose top housing. The shock oil filty dirty. I take my time look into this RC and found out many faulty and option parts.
Start blogger = 29/3/2018.
Update blog = 4/2/2026
Spending spareparts = Rm574.40
2017 - 2026 = 9 Years @
Made in China (🇨🇳)
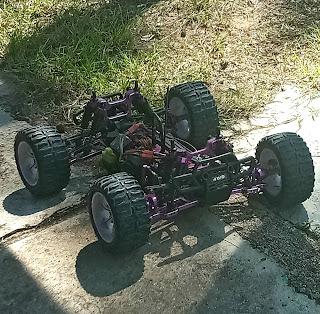
But anyway this problem found don't border me it can be my spare parts or i will repair it. This is my 22 RC car i have collect. Below the picture of the Truck i received. To show how a RC truck been not taking care.
In Malaysia RC Parts is expensive not like other country europe or taiwan. We didn't manufacture our own RC we need to import from out side like USA, Japan, Taiwan and China, Itali according to brand wanted.
The next photo i will show after cleaning and redo this truck. Some parts i order from Lazada more cheaper. Some plastic parts steering knuckle i change with extra parts that i have from my Bronto and Short course.
Only left not showing is the center long shaft still order from lazada. No receiver , no ESC. Soon if i get this parts i will show the picture
Final wheel alaiment all whell camber and toe only front. Rules too short toe just simple
Then do the wheel balancing, results all 4 wheel un balances, heavy one side.
Before put in the double rod ensure the top shock ball end must have same size longer. Ori ball end for Bronto outside longer then inside. After change double turn buckle, when do Camber alaiment it little bit hard .Both rod should be same length before turn, when 1 rod turn half other rod same. But manage to get 0 camber front and rear.
For this brontosaurus there are option parts using UJ replace using dogbone. Parts number 108015, after i buy the inner uj head too short after fixing, it should at the axle center but it nealy outside. when drive this truck posibility may come out. Add a 0.3mm washer at inner bearing but after tighten the wheel, Wheel can turn. That the problem for Made in China parts very cheap but quality not to standard.
Then i buy 188015 again the uj end wrong parts no hole for puting in the pin for holding the hex wheel. Need to think again how to modified this uj.
Complained from brontosaurus user the center UJ will break too, if the esc and battery use big power. UJ head must be cup type and the dogbone hollow. Then the uj will stronger. If both is hollow type can break eazy.
Finaly complete restore this HSP Brontosaurus. Some parts is cheap due to i buy loose parts from the shop 1 lum sum Rm100 so after caculation it courese me just Rm7.70 then divided to how many pcs i buy.
1. TRUCK = Rm100
2. Body = Rm 60
3. LRP ESC = Rm 50
4. Alum front and rear hub = Rm 120
5. Center shaft = Rm 15
6. 2 shock Absober = Rm 2.20
7. Cooling fan = Rm14.45
8. Battery holder = Rm7.70
9. Body post = Rm7.70
10. Bumper rear =Rm7.70
Total spending on this truck RM384.75. Happy for it another collection, Next looking for other secondhand RC to restore.
8/5/2020. Another 2 parts change. The front c hub and steering knuckle change to colour purple from blue. The C hub buy for Rm25 on 9/4/2018. The steering knuckle buy for RM20 8/5/2020. I use back the UJ that i buy add a washer on bearing so the UJ can move backward few mm on the hub. Almost full aluminium parts, next wating for aluminium gear box mounting and chassis.
22/5/2020. Finaly i get the aloy chassis, buy for Rm33 black in lazada and also the drive gear 64T. The chassis thickness is 0.3.5 inch and weight 242 gram. Better then plastic. Just assembly necessary parts in first. Waiting for the aluminium alloy gear box mount. The plastic already assemble in my brontosaurus III.


Below list of missing or damage parts.
1. All shock absorber low oil and dirty.
2. All shock absober wrongly fitted on ball end.
3. All wheels ball bearing full of dirt.
4. All shock absorber shaft rusty.
5. All shock absorber top rubber cup wrong size.
6. All shock absorber plastic mounting loose.
7. All rim scratch.
8. Chassis and parts dirty with sand and dust.
9. Damage body post another 3 pcs top section scratch.
10. Front steering arm missing.
11. Front and rear gearbox less grease.
12. Few shock absorber ballend wrong size.
13. Front lgs lower arm missing E clip. Using body pin.
14. Front c hub both rhs same parts. No lhs.
15. Front rhs rim crack.
16. Front lhs/rhs wheels axle scratch
17. Front lhs/rhs dogbone end deep scratch.
18. Missing one wheels ballbearing
19. Motor mounting 2 screw missing.
20. Missing 2 pcs shock absober.
21. Missing antenna mount.
22. Missing 4 pcs battery holder
23. No ESC
24. No motor.
25. No body.
26. No center shaft
27. No front center shaft axle.
25. No body.
26. No center shaft
27. No front center shaft axle.
28. No gear covef
29. One rear shock absober top mounting broken and use super glue to hold it.
30. One pcs dogbone dent.
31. One pcs shock absober ball end mounting dent.
32. Rear gearbox housing glue with super glue
33. Radio tray dent
34. Rear spring lhs/rhs touching turn buckle.
35. Steering plastic hub damage lhs and rhs
36. Some loose screw and dent
36. Some loose screw and dent
But anyway this problem found don't border me it can be my spare parts or i will repair it. This is my 22 RC car i have collect. Below the picture of the Truck i received. To show how a RC truck been not taking care.
In Malaysia RC Parts is expensive not like other country europe or taiwan. We didn't manufacture our own RC we need to import from out side like USA, Japan, Taiwan and China, Itali according to brand wanted.
 |
| The ori image from saller before repairing |
 |
| Look ok but details check many fault. |
 |
| In my RC workshop |
 |
| Under carrage scratch normal for secondhand RC. |
 |
| Front suspension arm bottom |
 |
| Rear suspension arm bottom |
 |
| Rhs steering dogbone came out |
 |
| The Wheel axle for front lhs/rhs heavy scratch and metal chip off due to rubbing to dogbone when turn. |
 |
| Front rhs suspension arm missing e clip add a pin on it |
 |
| Using a body clip |
 |
| Top radio tray |
 |
| Radio tray dent and the battery holder bracket with hold for the lion battery wayer. |
 |
| The analog servo with metel gear still function |
 |
| Analog servo K power M100 still function. I remove and add greese. |
 |
| Front shock Aluminium Tower missing 2 pcs damper |
 |
| Aluminium rear shock mounting |
 |
| The nylon gear still in good condition. Missing 1 radio tray screw and a loose motor bracket no dust cover for gear. |
 |
| Missing center shaft |
 |
| Fitted with wrong screw longer |
 |
| Lhs/Rhs rear spring touching the turn buckle wrongly fitted the shock absober seat on the ball end |
 |
| All the shock absober wrongly fitted on the ball end, deep inside the ball end. |
 |
| One shock absober bracket top broken he use super glue to glue it on the ball end |
 |
| With all rusty shock shaft |
 |
| All shock low on oil and with dark oil inside never change |
 |
| All shock fitted with wrong rubber cup big |
 |
| Rubber cup big size |
 |
| This is the oil inside all the shock absober |
 |
| Loose screw on the steering hub, worn off plastic hub |
 |
| The rear shock tower screw loose, to sove the problem super glue it on the housing |
 |
| Full of thick super glue on the housing |
 |
| Missing turn buckle end for steering servo and rusty |
 |
| Front bumper and rear impact tension too tight and some hole on rear bumper |
 |
| 3 rim still in good condition only side wall scratch. 1 rim crack. |
 |
| The rim crack, water can go in, it will make the wheel heavy . So i seal it with thick super glue. |
 |
| The tyre trade still half |
 |
| All wheel with aluminium 7mm hex. |
 |
| The front axle |
 |
| Damage steering knuckle plastic |
 |
| With damage screw, still been used. |
 |
| All moving parts with ball bearing only 1 with bushing and all dirty with dust |
 |
| Rear axle remove missing axle hub |
 |
| Front and rear axle case and mounting is same |
 |
| Remove the rear suspensions arm |
 |
| The axle not much greese, gear still ok |
 |
| The drive gear with greese no damage |
 |
| Steering linkage damage on the plastic housing |
 |
| The damper spring can't remove super glue. |
 |
| The c hub both same rhs. No lhs |
 |
| All parts been remove before total clean up |
The next photo i will show after cleaning and redo this truck. Some parts i order from Lazada more cheaper. Some plastic parts steering knuckle i change with extra parts that i have from my Bronto and Short course.
 |
| Every parts has been clean. |
 |
| The clean rear suspension parts. Put in the new axle hub blue the purple i fix at my SCT and motor mounting bracket. |
 |
| The front clean suspension part |
 |
| No more dent radio tray, hammer it back. |
 |
| Front shock must seat on the ball head, The bumper spring no more over tighten |
 |
| Back shock tower proper position for shock absober |
 |
| The clean center radio tray |
 |
| Under carrage clean |
 |
| Change new shock absober top mounting. Few shock with big hole need to change |
 |
| Put in a 540 motor and servo horn |
 |
| With new service rear shock all add new oil |
 |
| Front missing shock need to buy 2 pcs and 2 pcs body post |
 |
| Just tighten with screw, the antena post missing |
 |
| Front view full assemble |
 |
| Rear full assemble |
 |
| Finally i buy the antena post |
 |
| 4 pcs new long body post . |
 |
| New back bumper |
 |
| Buy another 2 pcs shock for front only RM10 |
 |
| New battery holder |
 |
| Buy this Jeep Wrangler body cover for RM60 |
 |
| Side view before make a hole and sticker |
 |
| Complete body |
 |
| Side Texas Edition sticker |
 |
| Back view i put a spare wheels |
 |
| Top view |
 |
| Front view i did't fully cut the body let it cover the front |
 |
| Another side |
Only left not showing is the center long shaft still order from lazada. No receiver , no ESC. Soon if i get this parts i will show the picture
 |
| I buy this LRP ESC very cheap just RM50. The original prices is RM399. Due to no one playing with brushed motor so this ESC left un sole. For this one i use it in this bronto. This ESC only have forward and brake no reverse. Sutabled for touring car. Just put in and try wooo very powerfull. Over 8 turn motor can use. I have buy 3 set of this LRP ESC other two no limit motor and over 6 turn motor. Only use Nimh or Nicd battery. |
 |
| I am using a 10T2W motor from Team Zero 5 Pro Macine wind Modified Brushed Motor |
 |
| The Digital LRP ESC V5.1 |
 |
| Using a Flysky Receiver |
 |
| The electrical parts |
 |
| Add a plastic handle bar from my kyosho. Eazy carry the truck |
 |
| Add a cooling alum fin on motor |
 |
| Left center shaft other parts fully restore. Rear wheel drive. |
 |
| Got my center shaft for Rm15 in blue Respray |
 |
| Buy Rm 120 front and rear alum hub in blue no purple. |
 |
| Rear hub. But need to change all blue to purple next if money in pocket full. |
Final wheel alaiment all whell camber and toe only front. Rules too short toe just simple
 |
| Front wheel alaiment |
 |
| Rear wheel camber adjustment |
Then do the wheel balancing, results all 4 wheel un balances, heavy one side.
 |
| Tyre too big touching table so i put on table age. All 4 wheel when turn rim bending can do, only balancing. |
 |
| Put at side |
 |
| Among 4 wheels this i put 2 pcs weight on it. |
 |
| Done let the glue dry before run. |
 |
| DIY a stabelizer bar for front. |
 |
| only front, the steering hub has a screw hole but rear hub and suspention arm have no screw hole |
 |
| Get this gear cover for free. Some they remove it but for me it very important to protect the gear from more damage by loose dirt or stone from the moving wheels, The body not fully protect all the component. To avoid more small dust or stone, if thare some gap seal it with silicon glue. |
 |
| I add double turn buckle rod to hold the front c hub. Single turnbuckle not strong holding, a little loose .Know more stable. |
 |
| Same for rear wheel hub double turn buckle rod. More strong then single rod. |
Before put in the double rod ensure the top shock ball end must have same size longer. Ori ball end for Bronto outside longer then inside. After change double turn buckle, when do Camber alaiment it little bit hard .Both rod should be same length before turn, when 1 rod turn half other rod same. But manage to get 0 camber front and rear.
For this brontosaurus there are option parts using UJ replace using dogbone. Parts number 108015, after i buy the inner uj head too short after fixing, it should at the axle center but it nealy outside. when drive this truck posibility may come out. Add a 0.3mm washer at inner bearing but after tighten the wheel, Wheel can turn. That the problem for Made in China parts very cheap but quality not to standard.
Then i buy 188015 again the uj end wrong parts no hole for puting in the pin for holding the hex wheel. Need to think again how to modified this uj.
 |
| Top ori part dogbone, Centre parts no 108015 UJ, for brontosaurus but inner hesdtoo out from axle. Third parts 188015 longer but no hole for hex pin. |
 |
| Almost at end, if truck jump or in movement maybe it will come out.It should at center . |
Complained from brontosaurus user the center UJ will break too, if the esc and battery use big power. UJ head must be cup type and the dogbone hollow. Then the uj will stronger. If both is hollow type can break eazy.
Finaly complete restore this HSP Brontosaurus. Some parts is cheap due to i buy loose parts from the shop 1 lum sum Rm100 so after caculation it courese me just Rm7.70 then divided to how many pcs i buy.
1. TRUCK = Rm100
2. Body = Rm 60
3. LRP ESC = Rm 50
4. Alum front and rear hub = Rm 120
5. Center shaft = Rm 15
6. 2 shock Absober = Rm 2.20
7. Cooling fan = Rm14.45
8. Battery holder = Rm7.70
9. Body post = Rm7.70
10. Bumper rear =Rm7.70
Total spending on this truck RM384.75. Happy for it another collection, Next looking for other secondhand RC to restore.
 |
| My two Brontosaurus Lhs buy new Rhs buy secondhand |
8/5/2020. Another 2 parts change. The front c hub and steering knuckle change to colour purple from blue. The C hub buy for Rm25 on 9/4/2018. The steering knuckle buy for RM20 8/5/2020. I use back the UJ that i buy add a washer on bearing so the UJ can move backward few mm on the hub. Almost full aluminium parts, next wating for aluminium gear box mounting and chassis.
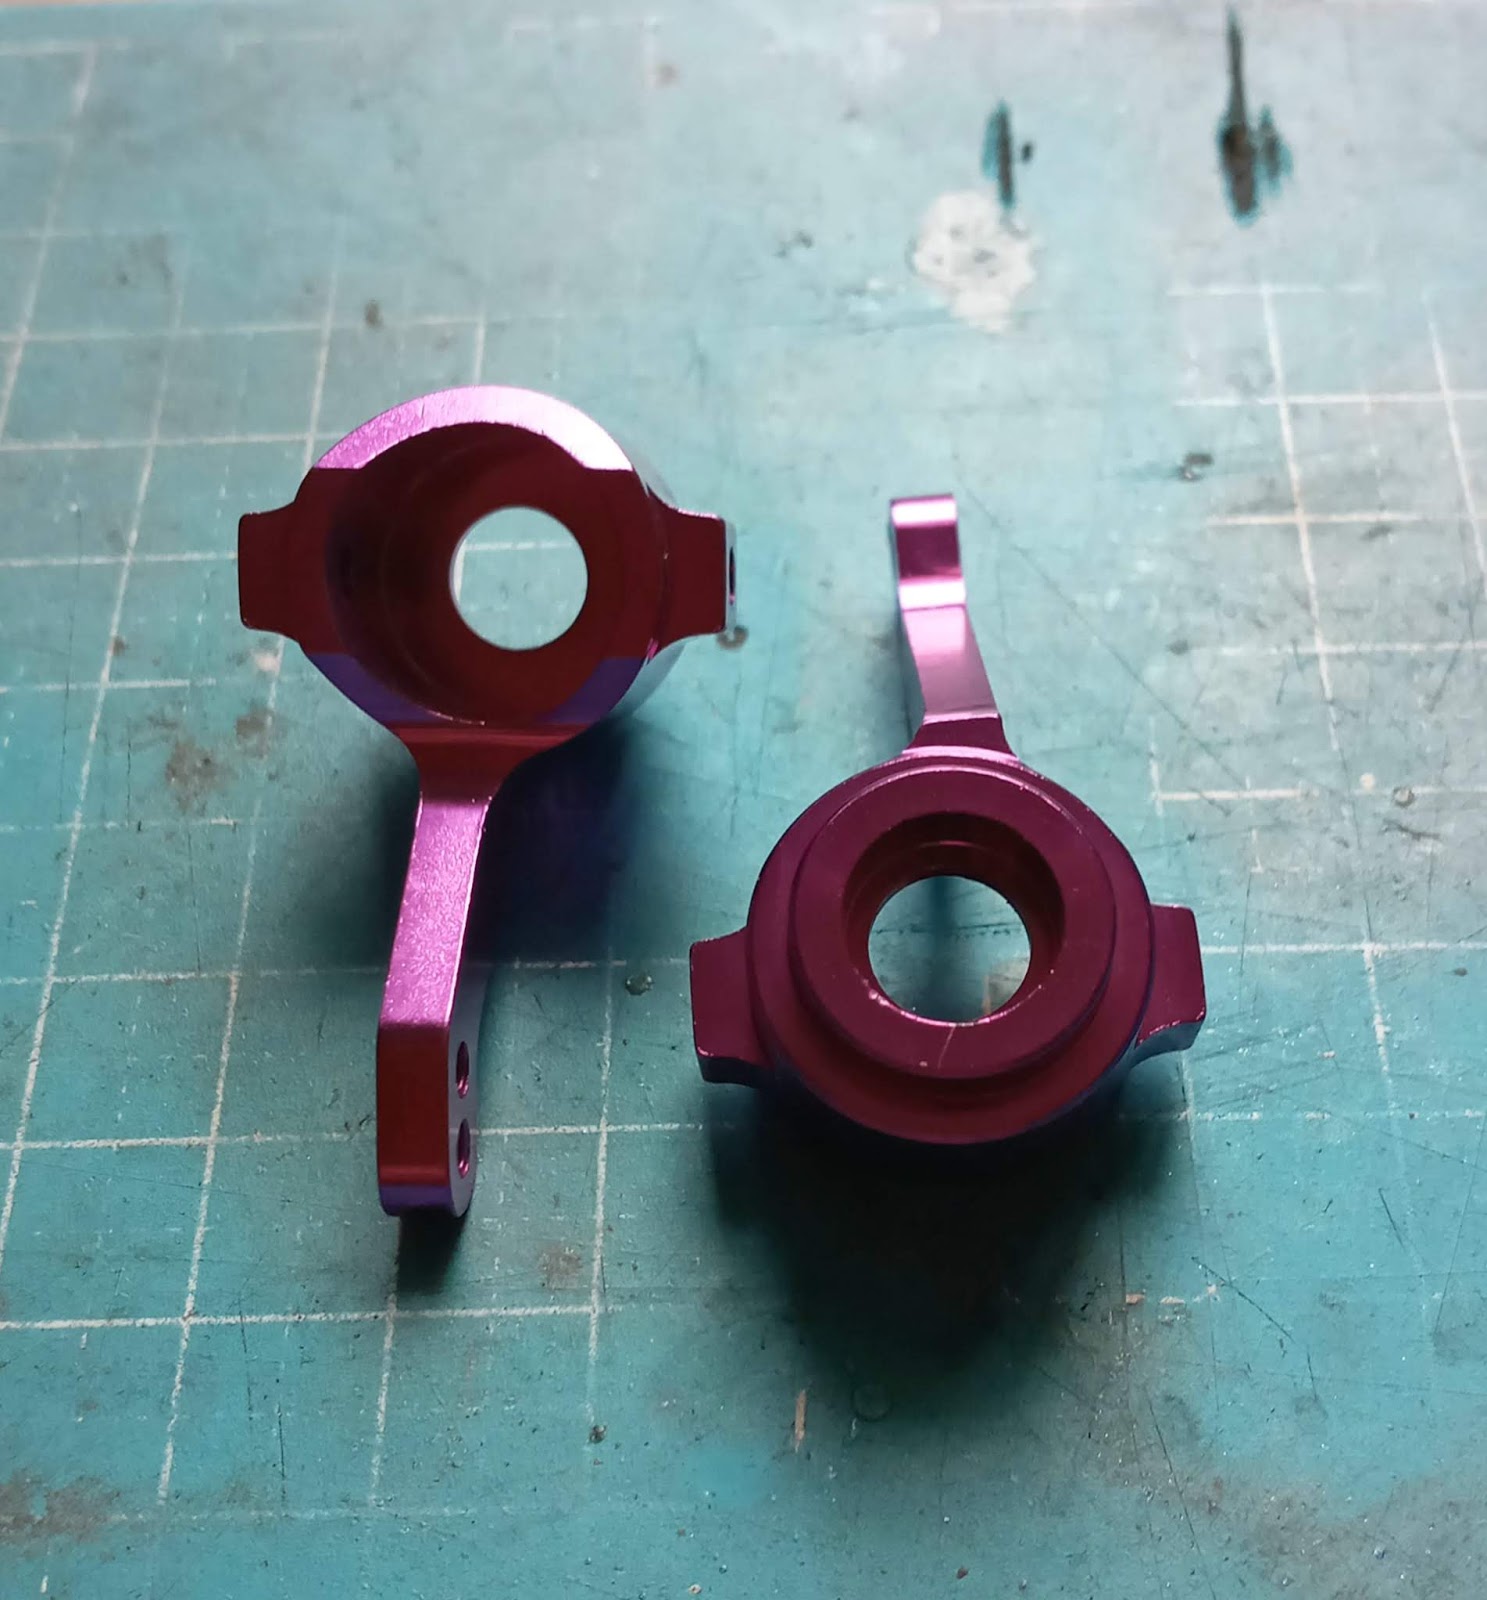 |
| Buy purple colour steering knuckle. |
 |
| Changing the purple c hub and steering hub. |
 |
| Using back the UJ add some washer on bearing. |
22/5/2020. Finaly i get the aloy chassis, buy for Rm33 black in lazada and also the drive gear 64T. The chassis thickness is 0.3.5 inch and weight 242 gram. Better then plastic. Just assembly necessary parts in first. Waiting for the aluminium alloy gear box mount. The plastic already assemble in my brontosaurus III.
 |
| Packing from China |
 |
| Another plastic wrapping well protected. |
 |
| The hole matching on my brontosaurus I. same chassis. Bottom view |
 |
| Top view |
 |
| The front section chassis bent upward, can't see much in plastic chassis. |
 |
| Change to metal maint gear 64T |
 |
| Add grease on the metal gear, prevents heat create on metal gear. If the maint gear is plastic no need many grease. |
 |
| HSP using WP-1040 esc with small switch. Need to put other area use double side tape it will come off. So do modification. |
 |
| Make two bracket to hold the big switch. |
 |
| I have no 4 pcs battery holder in this Brontosaurus II. So i use 2 long aluminium post inside and 1 pcs short outside. Add a soft carpet to prevent damaging the battery. Later if $$$ enough buy the plastic battery holder. |
 |
| Just reach 28/5/2020 New Alum Alloy motor mount, this brontosaurus II motor mount, i put in my brontosaurus III. |
On 4/6/2020 reach the front and rear gear box mounting in purple colour. Very light but when fitted in with the gear box side can't fit properly, need to cut away some plastic so it can fit to the aluminium mounting. It course Rm20. Buy from China threw Lazada.
For next parts to change to aluminium, if $ enought.
1. Steering set.
2. Servo holder bracket.
3. Battery corner holder.
4. Steering linkage.
5. Body post.
6. Servo arm.
7. Gear box.
Look at this truck before and after. From march 2018 to jun 2020. This truck have a great changes. Mosly after playing i will clean it. That how u must take care.
25/11/2020 my order for a steering set purple arrive buy for only Rm14 cheaper, some time to get cheaper product need always look at the lower prices in lazada or Shoopee.

 |
| Reach after 5 days order from china in Lazada |
 |
| Nice packing in a single plastic |
 |
| Top view different parts. Begining i thing front and rear can interchange. But can't. |
 |
| Bottom view almost same but look detail the side 3 hole is different. |
 |
| Both side can fit properly in the mounting, so at the gear box housing i need to grind out some plastick. |
 |
| Done nicely fits in . |
 |
| For rear gear box mounting |
 |
| Done all fix. |
 |
| DIY a cover from a aluminium to cover the receiver, from dust or water. Not a seal cover. At bottom add the double side tape so it stick on the receiver body. |
 |
| The cover i wrap with aluminium foil. |
 |
| New cooling fan the thicker blade. |
 |
| The electric side. The esc use double side tape, the new classic have no side cover like original. So the double side tape must be strong. |
 |
| For battery side, before i buy the aluminium battery stoper. |
 |
| Done change to aluminium parts. Still few more item. |
For next parts to change to aluminium, if $ enought.
1. Steering set.
2. Servo holder bracket.
3. Battery corner holder.
4. Steering linkage.
5. Body post.
6. Servo arm.
7. Gear box.
Look at this truck before and after. From march 2018 to jun 2020. This truck have a great changes. Mosly after playing i will clean it. That how u must take care.
 |
| Before |
 |
| After. |
 |
| Almost aluminium parts. |
25/11/2020 my order for a steering set purple arrive buy for only Rm14 cheaper, some time to get cheaper product need always look at the lower prices in lazada or Shoopee.


I do modification on ESC cooling fan, old i cut out a square plastic mesh and screw it with fan. Now i use a metal mesh to cover it, make square and cover it no glue or hold by screw. All my ESC i change to this style.


17/1/2021, i need this plastic battery holder bracket for other truck i buy a set aluminium alloy battery holder for this brontosaurus 2.
 |
| Purple in colour for this brontosaurus |
 |
| The jeep Cherokee body i remove put at my HSP Tornado. I change using body from my first brontosaurus. |
26/11/2022 take out and drive around


Done Enjoy RC


Comments